
The percentage of WooCommerce users is growing rapidly. You would be surprised to know that, 28.19% of all online stores are powered by WooCommerce. And many of them maintain their site without hiring any developers.
WoooComerce is a free plugin and anyone can use it. So, all of the sites that started using WooCommerce are having the same design. But it is not a good thing from a branding perspective. Because an idle business or online store always has its unique designs. So what to do?
Yes, using a different theme rather than the storefront can be a solution. But, most WordPress themes don’t provide the freedom to customize it according to our needs. That’s why I prefer a different approach to this. So, are you curious to know about how to create a custom shop page in WooCommerce?
To create a custom shop page, I use the WooCommerce Builder Addon of ProductX. You can also do it by following 4 simple steps:
- Step: Install ProductX Gutenberg WooCommerc Blocks Plugin.
- Step: Turn on WooCommerce Builder Addon for ProductX.
- Step: Create a new Shop Page Template.
- Step: Customize the Shop Page Template.
How to Create a Custom Shop Page in WooCommerce using ProductX
As I have mentioned all the steps to create a custom shop page, Now it’s time to guide you through all the steps.
Step-1: Install ProductX Gutenberg WooCommerc Blocks Plugin.
ProductX Gutenberg WooCommerce Blocks is an all-in-one solution for creating WooCommerce stores with ease. With this simple WordPress plugin, you can create any kind of WooCommerce store with all the essential features an online store should have.
So, first of all, we have to install it from our WordPress dashboard. For that:
- Navigate to the Plugin section and click on “Add New”.
- Type “ProductX” on the WordPress search bar.
- Install and activate the plugin.

Step-2: Turn on WooCommerce Builder Addon for ProductX.
ProductX offers multiple addons to expand its functionality and WooCommerce builder is one of them. It helps us to create customized templates for WooComerce Shop, Archive, and Single Product Pages.
As we want to create a custom shop page we need to use it. So after successfully installing the ProductX plugin, we have to turn on the WooCommerce Builder addon for ProductX. For that:
- Navigate to the ProductX section.
- Click on “Addons”.
- Turn on the WooCommerce Builder.

Step-3: Create a new Shop Page Template.
Once we turn on the addon, a new option as Builder will appear along with all other options of ProductX. From there we can create custom templates and customize them anytime we want. So without further ado let’s get started.
- Navigate to the ProductX section.
- Click on the “Builder” option.
- Click on the “Add New” Button.
- Add a name for the template.
- Choose Template type as “Shop”
- Click on the “Create Template” button.
- Click on the “Save and Edit” button.

That’s all the shop page template is ready and it is already replaced with the current template of our WooCommerce site. However, it is a blank page as we didn’t add anything yet.
Step-4: Customize the Shop Page Template.
Now comes the main and most interesting part of this blog post which is customizing the shop page template.
As we have created a template, now we have to customize it from scratch according to our needs. How?
Well, ProuductX offers multiple premade designs known as the starter packs and lots of WooCommerce blocks. So we can use either of these two or both of these options.
WooCommerce Blocks
First of all, let’s see how to use the WooCommerce blocks to customize the shop page. Currently, ProductX offers 10 WooCommerce blocks which are Product Grid Blocks, Product Listing Blocks, Product Category Blocks, Image Blocks, Header Blocks, etc.

So first of all I would like to have a Product Slider at the top of my Shop page. For that, I need to click on the plus Icon and add a Product Grid Block. Then I have to change the slider by importing it from the premade design section.
In the same way, we can add out desired blocks and customize them according to our needs. As ProductX provides the freedom to customize all available blocks.
Starter Packs
Now it’s time to introduce the premade starter packs of ProductX. If you wondering what are starter packs. These are pre-made designs that you can import to the shop page. So that, all the products of your WooCommerce store will preview on the shop page according to the design you have imported.
Currently, there are 6 starter packs available to import and more are coming soon. Now, let’s see how we can import the starter packs.
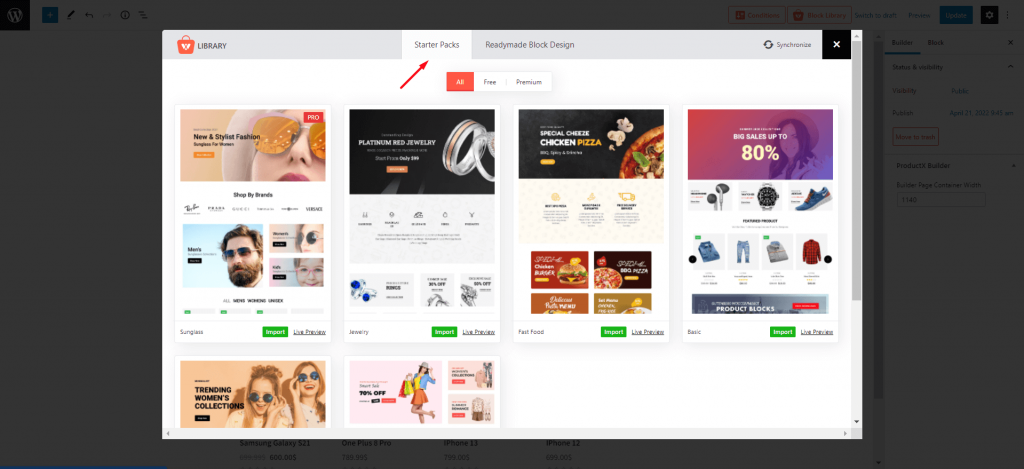
While editing the shop page we have to click on the block library. Then decide which pack we want to import. At last, we have to click on the import button of the desired pack. So that exact design will be added to our shop page.
***Please note the above process will only import the layout/design, not the demo products. So that, your store should have products to take place in the design of the starter packs.
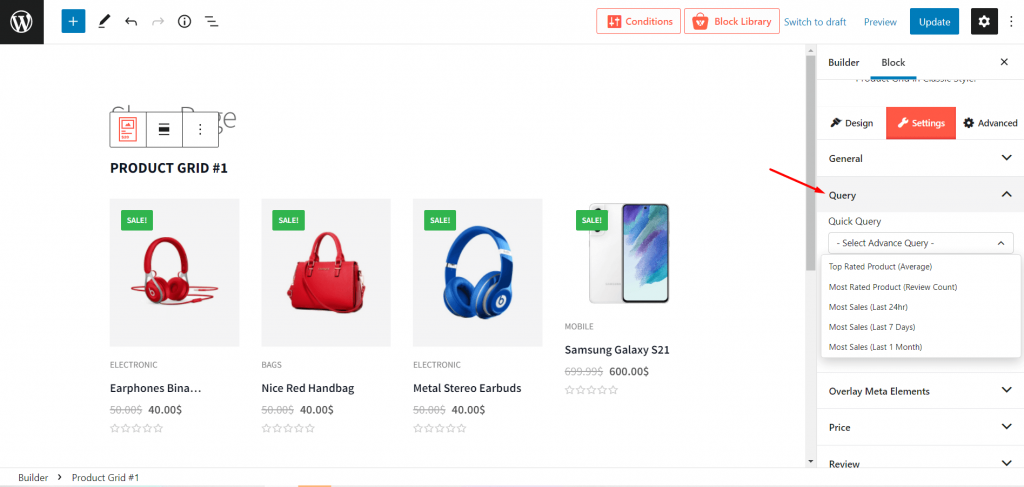
Sorts Products using Product Query
With the help of the product query feature, we can set the number of products and sort them by depending on criteria such as most sold products, most rated products, most viewed products, random products, etc for any of the blocks of PorductX.
Filter Products
ProductX offers ajax powered filtering feature. So that, the visitors can explore products within a block and without reloading the whole shop page. Here’s how:
- Select a block of the shop page.
- Turn on the filter option from general settings.
- Navigate to filter options.
- Select a filter type from the category or tag.
- Add single or multiple categories or tags.
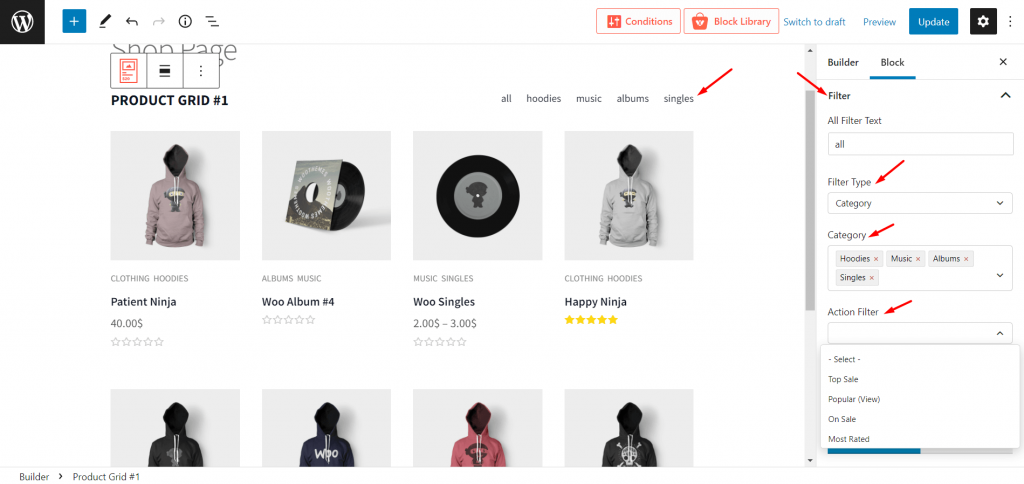
You can also explore the action filter options that offer to filter products depending on the sale, top-rated, most rated, new arrival, etc.
Add Ajax Pagination
ProductX offers two types of ajax pagination which are Load More and Numeric paginations. As it is ajax powered pagination the users can explore more products within a block and without reloading the sho page. Follow the below steps to add it to your shop page.

- Select the block where you want to add the pagination
- Turn on pagination from the general setting
- Navigate to the pagination options
- Choose pagination type
- Customize it according to your need
Wishlist Addon
ProductX also offers a wishlist addon by which you can let the users select their desired products as a wishlist. Later, they can add the products to the cart from the wishlist page. There are two types of wishlist features available which are pop-up wishlist and redirection to a wishlist page. Here’s how you can configure it:

- Turn on Wishlist Addon.
- Navigate to the Wishlist setting.
- Setup a wishlist page.
- Configure it according to your need.
- Enable it on the shop page from the general setting.
Quick View
Quick View addon can make it possible to let the visitors explore product details in a pop-up window without leaving the shop page. It also has the next and previous buttons so that the visitors can explore details of all products on the shop page within the quick view mode. To start using this feature:

- Go to the all addons section of ProductX.
- Turn on the Quick View addon.
- Configure it from the setting options.
- Enable it for the shop page.

Flip Image Addon
It helps to enable the image flipper feature on the shop page. So that, when the visitors hover over an image it will be changed to another image. But to work properly the products must have gallery images. As it flipped to the first image of the gallery. However, you can also set a custom image to make the flip image attractive. Here’s how you can configure it:

- Go to the all addons section of ProductX.
- Turn on the Flip Image addon.
- Enable it on the Sho page.
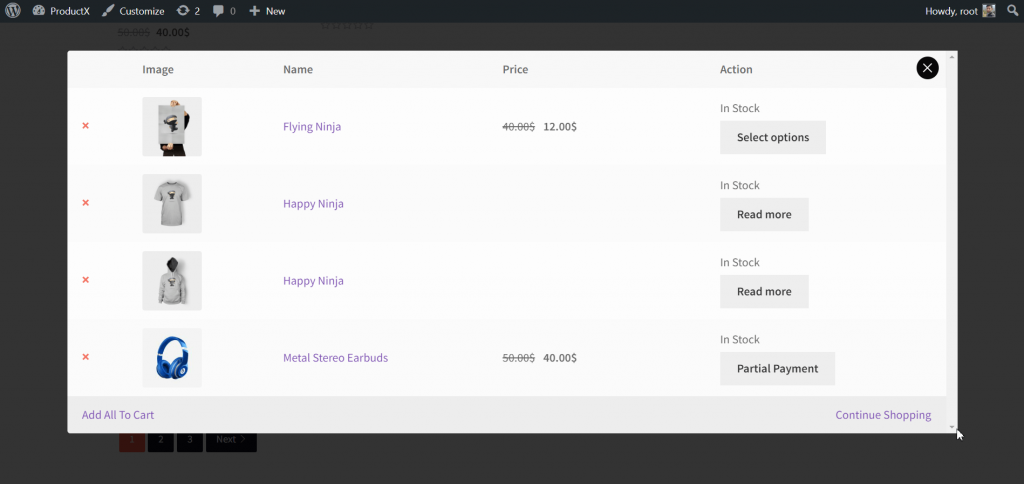
Product Comparison Addon
It helps us to let the visitors of our WooCommerce stores compare the similar type of products. It makes the decisions easier for the potential customers. Check out the steps to start using it:

- Turn on Compare addon from all addons section.
- Configure compare page via shortcode.
- Enable it on the custom shop page.

Benefits of ProductX to create Custom Shop page in WooCommerce
Now that, you have learned how to create a custom shop page in WooCommerce. There are many WooCommerce plugins available to create and customize shop pages. So, why should you choose ProductX instead of other plugins?
Well, ProductX has numerous features and multiple add-ons to expand the capabilities of WooCommerce for that you should choose it as your all-in-one solution for your WooCommerce store. Although, ProductXoffers so many benefits but below are some of the attractive benefits that you may want to know about.
Complete Solution: As I have mentioned that ProductX is an all-in-one solution. So that, you don’t need to install multiple plugins to ensure multiple features. You can use it as a complete solution as it has numerous features and multiple pro addons to fulfill all requirements for an idle online store.
Codeless Customization: If you want to customize your WooCommerce store without writing codes or hiring developers, ProductX can be your first choice. Because using the ProductX plugin is very easy. Anyone who has a basic knowledge of WordPress and WooCommerce can easily use it as it provides codeless customization options for users.
Conversion Focused: As an eCommerce site owner, you probably being concerned about the conversion rate of your WooCommcer store. If so, you should start using the ProductX plugin. It is highly conversion-focused with lots of features that are required to fulfill the practices that are done by the store owners to increase the conversion rate. Such as stock progress bar, call for price, wishlist, products comparison, partial payments, pre-orders, backorder, etc.
Value for Money: The ProductX plugin has both free and pro versions. The free version of this plugin provides lots of useful features. And, if you want to expand its functionalities, the pro version price starts from $49 only. With this small amount of money, you can get so many benefits. Especially each of the addons of Productx can compete with the individual plugins that offer single features that may cost you $20 to $100 each.
Regular Updates: Like all other plugins ProductX provides regular updates to stay compatible with other plugins and themes. Not only that but the ProductX updates also provides fixing errors and bugs to ensure a better experience for the users.
Conclusion
That’s all about how to create a custom shop page in WooCommerce. If you face any difficulties while creating or customizing a shop page feel free to comment below.